Gol Gappa Recipe
Gol Gappa Recipe (Delhi Style) | Gol Gappa Pani
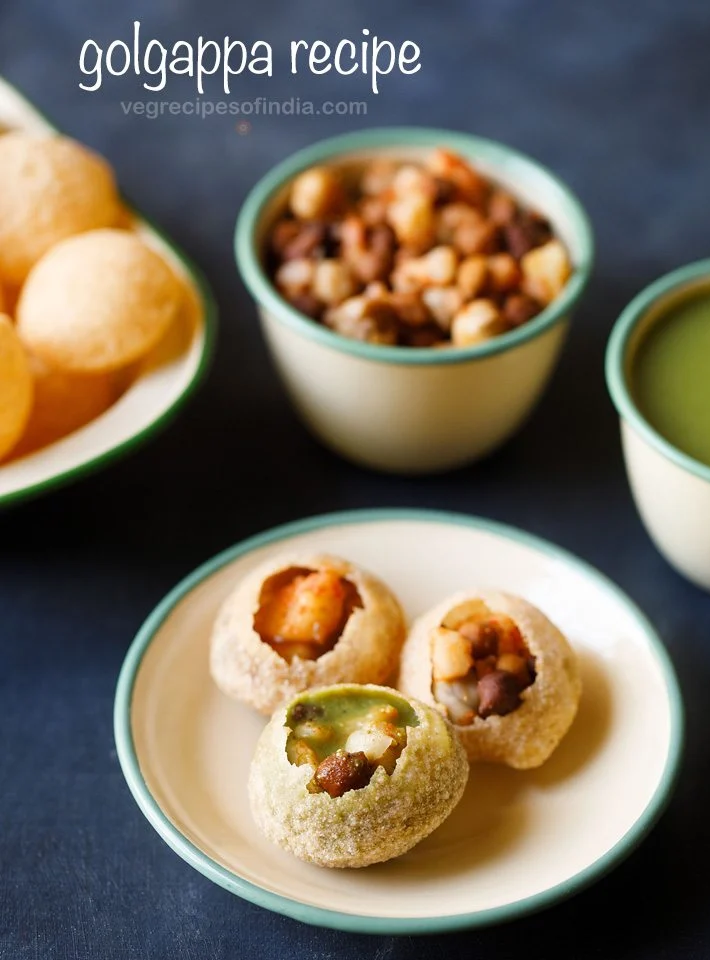
Unable to sample one of the most well-liked street food snacks, golgappa, on a visit to Delhi in North India would be incomplete. But it’s not just in Delhi; this delectable dessert is known by several names throughout India. It is referred to as pani puri in Maharashtra, puchka in West Bengal, gupchup in Bihar and Jharkhand, and pani puri in Maharashtra. A crucial component of every Golgappa dinner, the tangy and delicious Golgappa Pani is demonstrated in this dish.
This recipe concentrates on creating golgappa in the North Indian style, namely the kind that is popular in Delhi and the surrounding areas.
I formerly resided in Gurugram (Gurgaon), where we occasionally ate golgappe purchased from street sellers. The stuffing is what makes them unique; unlike the Pani puri stuffing you’d find in Mumbai, it contains some boiled potatoes and either white chickpeas or black chickpeas.
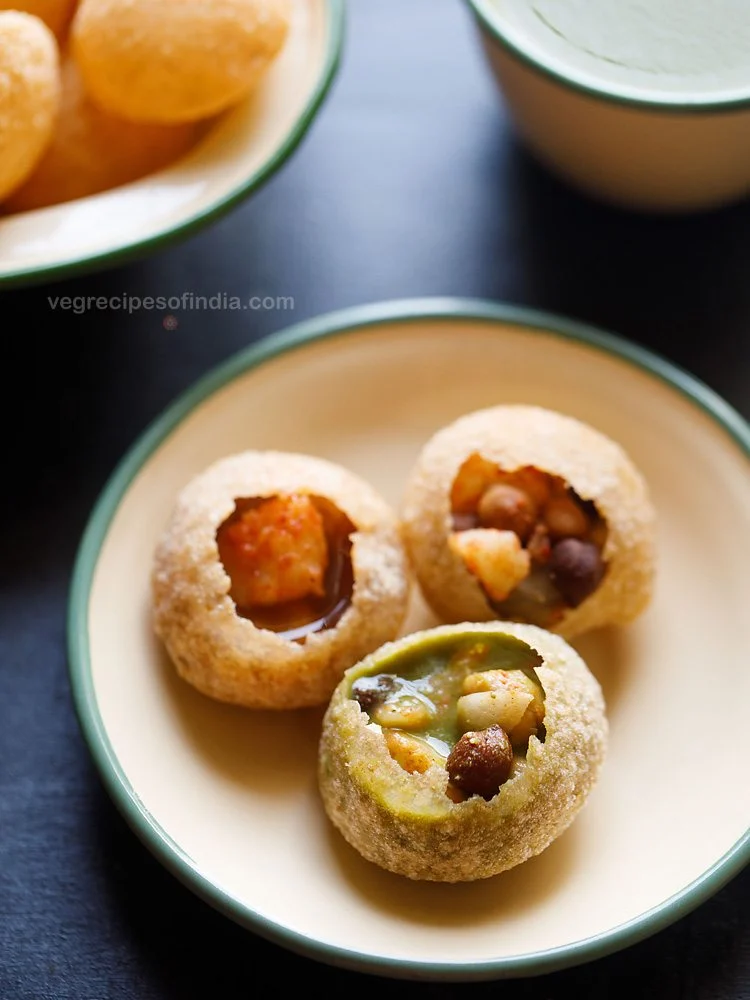
Let’s now discuss the hot water, also known as golgappa pani. It might have distinct flavors depending on where you are. While some favor jaljeera pani, hing pani, or amchur (dried mango) pani, others use mint leaves. In addition, the delicious sweetness of the meetha pani, a sweet tamarind chutney, completes the experience. Have fun on your Golgappa journey!
I’m going to provide a mint and spice-based jaljeera recipe in this article. The spicy and sour water for Golgappa is still made using the same jaljeera recipe that I shared a few years ago.
Let’s now discuss the Golgappa puri, the fried golgappa shells. Either whole wheat flour (atta) or cream of wheat (sooji/rava) can be used to prepare them. You can decide. Just keep in mind that atta Golgappe are frequently larger than sooji ones.
I always make sure to enjoy some Golgappe while I’m in Delhi or Gurugram, along with my beloved Chana Bhatura and Aloo Tikki.
The jaljeera pani can be made a few hours ahead of time and kept in the fridge. I’ll demonstrate how to make the jaljeera pani and the golgappa filling in this post.
Visit my post on golgappa puri if you prefer golgappe cooked with sooji. You may also use my Imli chutney recipe for the sweet and sour tamarind chutney (Meethi pani or imli chutney).
Keep in mind that gol gappe are best consumed immediately after preparation.
Let’s get started by learning how to create golgappa!
1) Producing golgappa pani
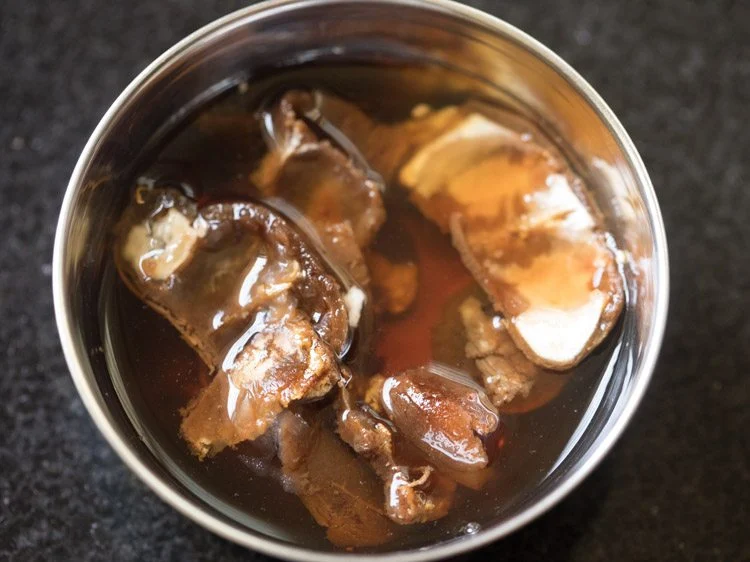
1. To begin, steep 1 tablespoon of tamarind in 14 cup of boiling water for 20 minutes or so.

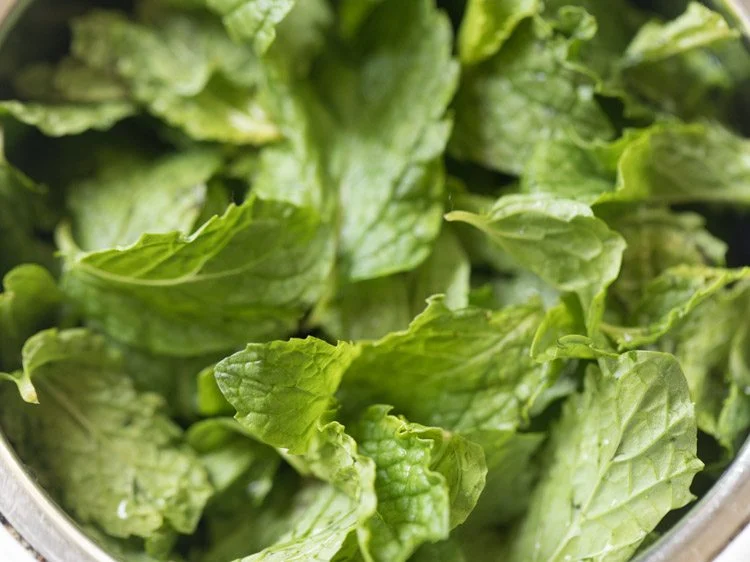
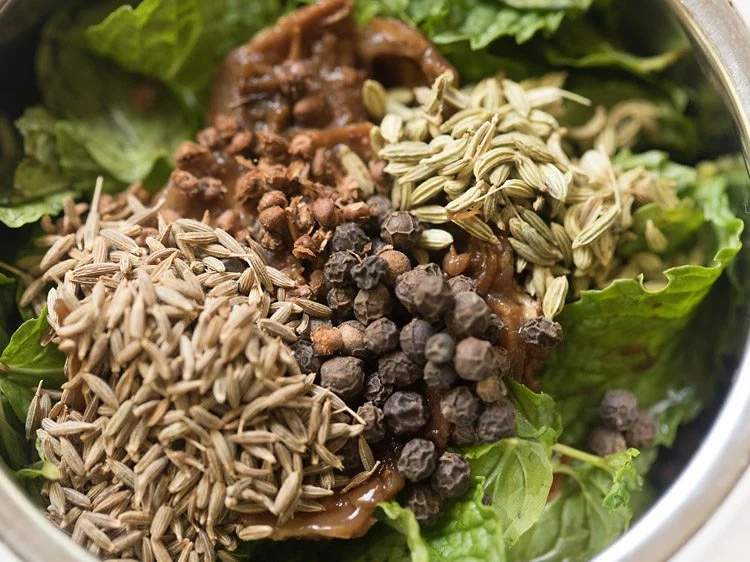
2. Place a third cup of fresh mint leaves in a little grinder jar. Because the stems might turn the pani bitter, just use the leaves of the mint plant. Before adding the mint leaves to the grinder jar, make sure to thoroughly rinse them with water.
3. Include the tamarind and water it was soaked in. Make sure there are no seeds in the tamarind.
4. Add the following seasonings now:
Cumin seeds, 1.5 tablespoons
Fennel seeds, 1 teaspoon
Black pepper, half a teaspoon
removing the seeds from one black cardamom. Throw off the outside cardamom cover. Cardamom should be lightly crushed in a mortar and pestle to release the seeds, which should then be taken out.
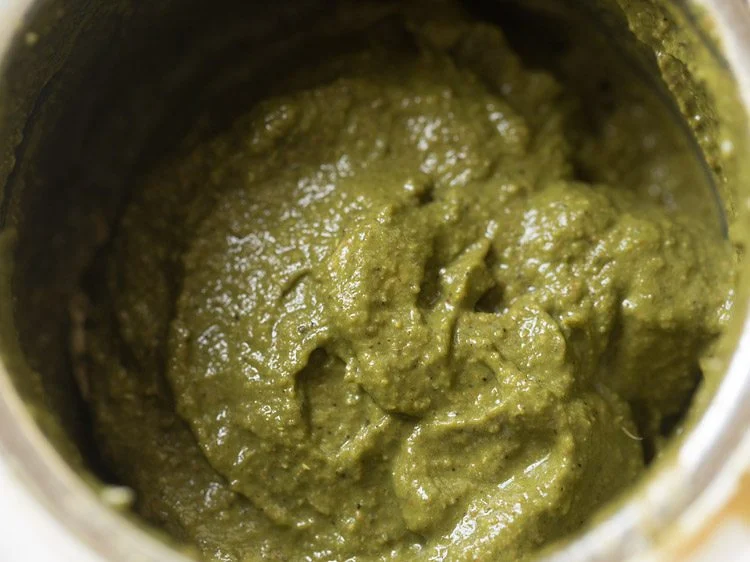
5. Making the Jaljeera Chutney,
It’s time to flavor our Golgappa Pani at this point. What you’ll need is as follows:
1 teaspoon of amchur, a dry mango powder
1 chaat masala teaspoon
A small amount of asafoetida
as required, black salt
Don’t worry if you don’t have dry mango powder. For that acidic kick, you might use some lemon juice in its place. Additionally, rock salt or sea salt will do the trick if you don’t have black salt.
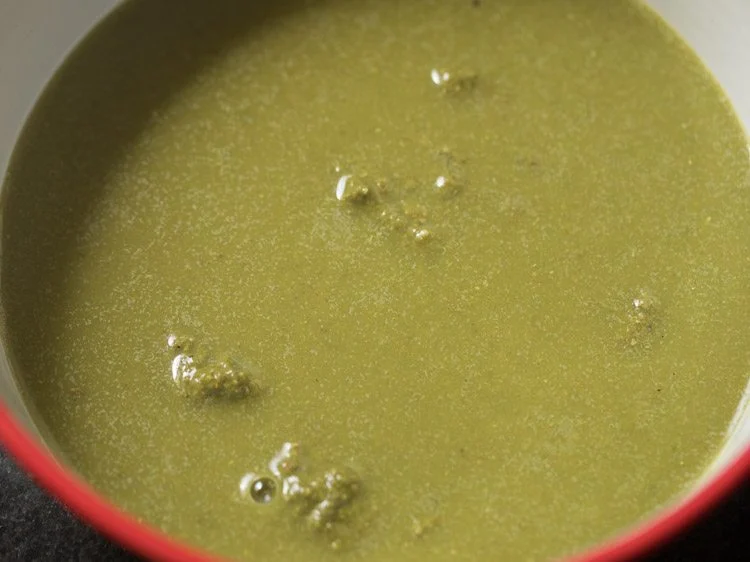
6. Combine and blend all of these ingredients to make a smooth chutney.
7. Place the freshly prepared jaljeera chutney in a bowl. Add 1.5 cups of water and thoroughly combine everything before continuing.
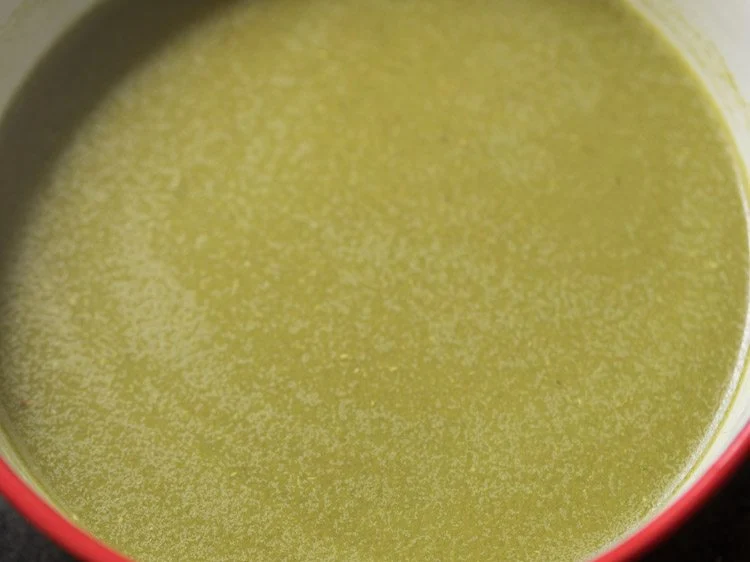
8. Give the golgappa pani a taste and season as necessary. You can add more black salt or dry mango powder if it needs a little more tang or salt, respectively. You can add some lemon juice as well, if you’d like, for some added zing.

You can add a little more lemon juice to the pani to balance it out if it ever becomes too bitter (this can happen depending on the type and grade of the mint leaves). Additionally, feel free to store your Golgappa Pani in the refrigerator if you prefer it cold.
Let’s get started on making the filling for your golgappe right away!
9. Making Golgappa Stuffing
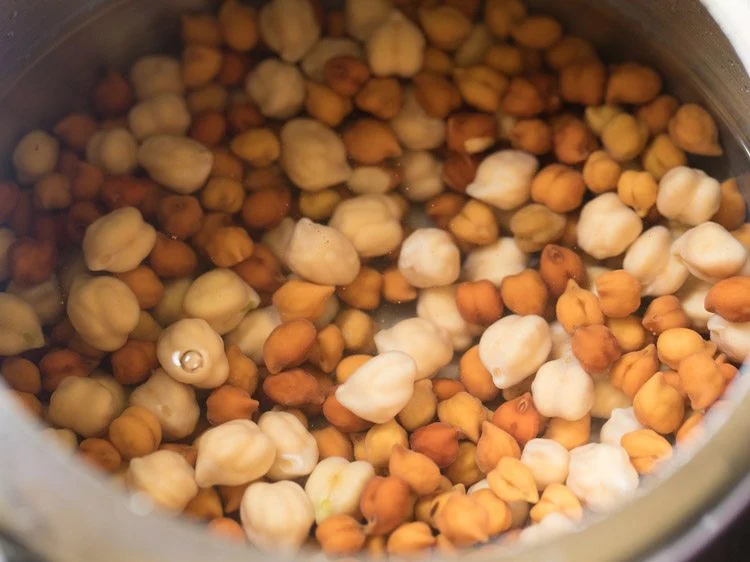
To begin, rinse and soak 1/3 cup each of white and black chickpeas in enough water to cover them overnight or for about 8 to 9 hours. After soaking, completely drain the water and give the chickpeas a good rinse under running water.
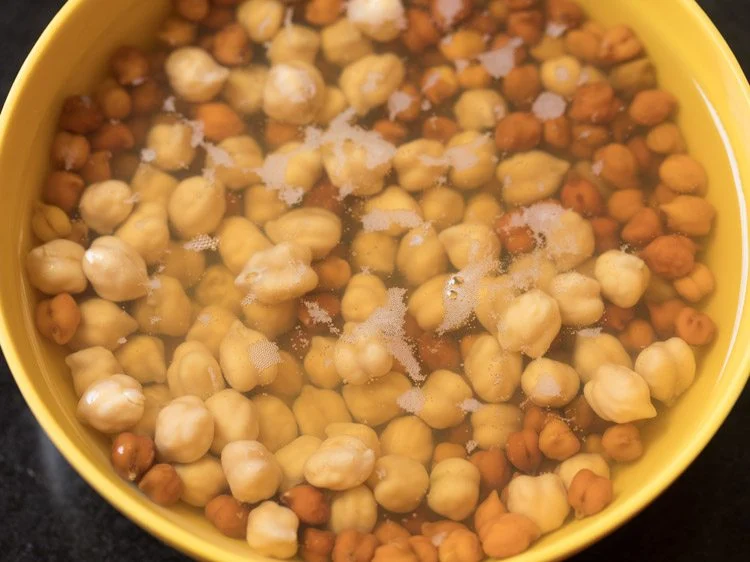
10. Put the chickpeas that have been soaked in a stovetop pressure cooker. If you’d want, you can also use only one variety of chickpea.